How to use React inside a Wordpress application ?
The context
I was asked a few weeks ago to build a new page on a existing Wordpress site, in order to build a “shop area”:

I am not very efficient to work on Wordpress template system (not my cup of tea!), and I have now a solid background around React frontend. I want to see how it can be possible to integrate, on an existing Wordpress installation, one React application to produce this particular need.
This article will explore the Wordpress/React options, then I will show you, step by step how I have implemented a React application inside Wordpress. Finally I list you a few issues of the actual solution.
React with Wordpress?
React is a popular javascript library that is generally used to build frontend application inside the browser. There is also a huge ecosystem of solutions around React (CreateReactApp, NextJs, Gatsby…) that help to use the library in a reliable frontend application.
Wordpress is a very famous CMS (Content Management System) that is still used by a lot of website. It’s very easy to use for content editor, and it comes with lots of plugins.
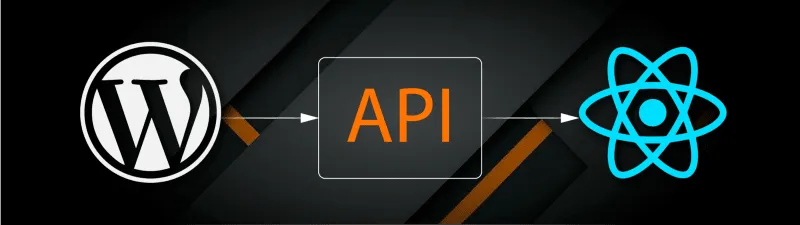
There is multiple ways to mix Wordpress and React, but I will show you two examples here.
Build a javascript frontend using Wordpress REST API
Wordpress comes with a nice REST API, and so it’s possible to build a classic Single Page Application (using CreateReactApp for example) that consume this API. Wordpress is still used to write articles, but the website generated is driven by a different frontend application. It’s the Headless CMS concept. This article is a great guide to achieve this:
How to Create a Modern Web App Using WordPress and React
Gatsby, a static site builder using React, have also a dedicated solution here:
This solution is a radical one for an already existing website, as you need to work on all existing content and transfert it to your new frontend solution. It’s nice but it’s too big for my own project.
Integrate a React application inside Wordpress
React is only a simple javascript library. It’s not needed to build an entire site, you can just load the library on a part of your existing page. From the documentation of ReactJs:
React has been designed from the start for gradual adoption, and you can use as little or as much React as you need. Perhaps you only want to add some “sprinkles of interactivity” to an existing page. React components are a great way to do that.
I have a few article disussing how to add a React application in a Wordpress site. This one show that, but for the administration panel:
Ghost Inspector - Automated Website Testing and Monitoring
I choose to go on this way because it’s easier than rebuild the entire site, and it give me enough power to work like I want.
Integrate a React application in Wordpress
I want to build a page, visible by end-users, that is loading a React application showing some articles of a particular category from the Wordpress website in a grid layout. This section will guide you in the creation of this page.
The big picture
I will create a new wordpress plugin. The plugin will show the React application if I use a specific short-code in a page or an article. The React application will consume the REST API of Wordpress to show the articles.
Build a dedicated plugin
To isolate the development I choose to work in a dedicated plugin. It is also possible to work in the theme functions.php but I think it’s cleaner to have a specific folder for this project.
In the plugins folder of your wordpress application, make a new folder named my-react-app. Create inside the folder a php file my-react-app.php.
Inside my-react-app let’s bootstrap a new Create React App project:
npx create-react-app frontendIt will create inside the folder frontend a new React application using the class Create React App.
In the php file you can put:
<?php
/**
 * Plugin Name: my-react-app
 * Plugin URI: a url
 * Description: A react application
 * Version: 0.1
 * Text Domain: my-react-app
 * Author: Julien Bras
 * Author URI: https://sidoine.org
 */

// First register resources with init
function my_react_app_init() {
    $path = "/frontend/static";
    if(getenv('WP_ENV')=="development") {
        $path = "/frontend/build/static";
    }
    wp_register_script("my_react_app_js", plugins_url($path."/js/main.js", __FILE__), array(), "1.0", false);
    wp_register_style("my_react_app_css", plugins_url($path."/css/main.css", __FILE__), array(), "1.0", "all");
}

add_action( 'init', 'my_react_app_init' );

// Function for the short code that call React app
function my_react_app() {
    wp_enqueue_script("my_react_app_js", '1.0', true);
    wp_enqueue_style("my_react_app_css");
    return "<div id=\"my_react_app\"></div>";
}

add_shortcode('my_react_app', 'my_react_app');
You will end with this structure:
plugins
└── my-react-app
    ├── frontend
        │     ├── README.md
        │     ├── node_modules
        │     ├── package.json
        │     ├── .gitignore
        │     ├── public
        │     └── src
    └── my-react-app.php
Good ! The basic setup is now working ! Let’s test it!
Develop your React app
Go into the frontend folder. Start the development server by running:
yarn && yarn startReplace yarn by npm if needed ! It will start a browser and show you this:
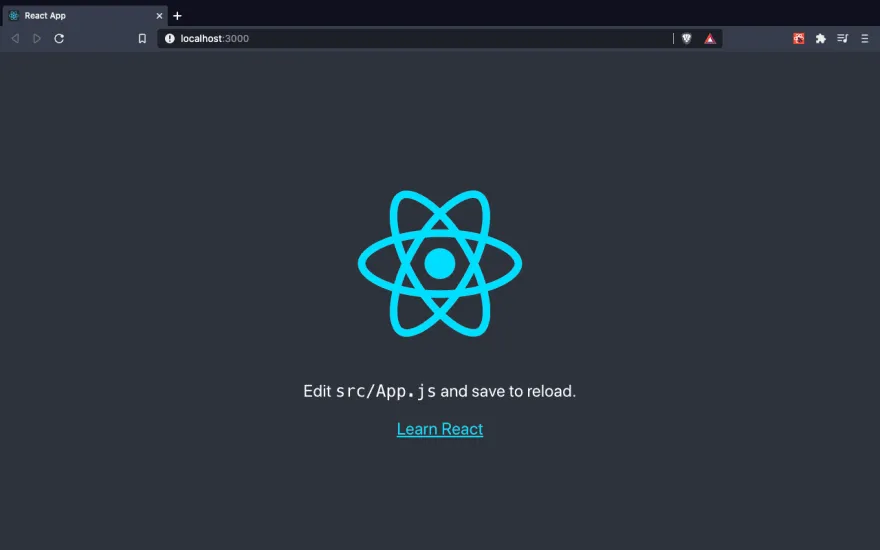
You can start by editing any of the file under frontend/src and actually develop your application.
Build your React app
In order to use your application in Wordpress you need to build it. I haven’t found yet a solution to develop the application directly inside Wordpress. To build the output for Wordpress, I recommend to rely on craco, a tool that can help to generate a single js file with predictable name.
First install craco:
yarn add @craco/cracoThen create a craco.config.js in frontend folder:
// craco.config.js
module.exports = {
  webpack: {
    configure: {
      output: {
        filename: "static/js/[name].js",
      },
      optimization: {
        runtimeChunk: false,
        splitChunks: {
          chunks(chunk) {
            return false;
          },
        },
      },
    },
  },
  plugins: [
    {
      plugin: {
        overrideWebpackConfig: ({ webpackConfig }) => {
          webpackConfig.plugins[5].options.filename = "static/css/[name].css";
          return webpackConfig;
        },
      },
      options: {},
    },
  ],
};
Then edit the package.json file for the build command:
"scripts": {
    ...
    "build": "craco build",
    ...
  },
Comment the reportWebVitals(); in frontend/src/index.js: (it prevent from having a single js file, dont forget to remove the import too !)
// If you want to start measuring performance in your app, pass a function
// to log results (for example: reportWebVitals(console.log))
// or send to an analytics endpoint. Learn more: https://bit.ly/CRA-vitals
// reportWebVitals();
Modify the div id used in frontend/src/index.js:
ReactDOM.render(
  <React.StrictMode>
    <App />
  </React.StrictMode>,
  document.getElementById("my_react_app")
);
Modify the div id used in frontend/public/index.html:
<body>
  <noscript>You need to enable JavaScript to run this app.</noscript>
  <div id="my_react_app"></div>
  <!--
      This HTML file is a template.
      If you open it directly in the browser, you will see an empty page.

      You can add webfonts, meta tags, or analytics to this file.
      The build step will place the bundled scripts into the <body> tag.

      To begin the development, run `npm start` or `yarn start`.
      To create a production bundle, use `npm run build` or `yarn build`.
    -->
</body>
It’s important to modify the id because by default the root is too generic for something we will include on a Wordpress page.
Add also a homepage value in the package.json (this will help for images):
"version": "0.1.0",
"private": true,
"homepage": "/app/plugins/my-react-app/frontend/build/",
"dependencies": ...
Then test the build !
yarn buildIt will generate a build folder inside frontend (with a single script.js file):
yarn run v1.22.4
$ craco build
Creating an optimized production build...
Compiled successfully.

File sizes after gzip:

  41.86 KB  build/static/js/main.js
  518 B     build/static/css/main.css

The project was built assuming it is hosted at /app/plugins/my-react-app/frontend/build/.
You can control this with the homepage field in your package.json.

The build folder is ready to be deployed.

Find out more about deployment here:

  https://cra.link/deployment

✨  Done in 6.46s.
Test on Wordpress
Login on your Wordpress installation and activate the my-react-app plugin. Then in any page or article, use the short-code [my_react_app]like this:
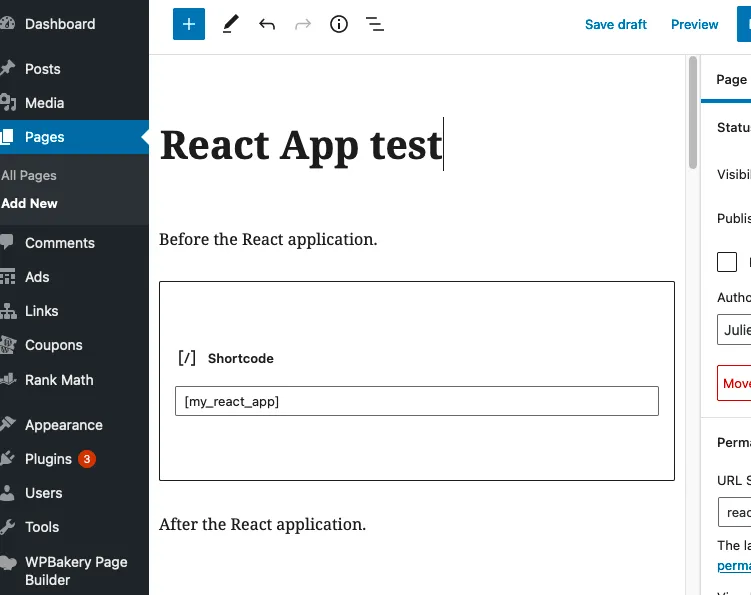
If you publish the page you will see:

It’s a win 🏆 !
Use REST API
Inside the React application it’s very easy to consume the REST API. I am actually using a API constant that point to the correct endpoint:
export const API = process.env.REACT_APP_API || `${window.origin}/wp-json`;So I am able to define the environment variable REACT_APP_API in the .env file if I want to not use the wordpress on the same host (development mode).
Then inside a React component, I can use a useEffect to populate a items state:
useEffect(() => {
  let category = process.env.REACT_APP_CATEGORY;
  const params = new URLSearchParams({
    categories: category,
    _fields: "id,title,meta,content,featured_media,fimg_url,tags",
    per_page: 100,
  });
  fetch(`${API}/wp/v2/posts?${params}`)
    .then((res) => res.json())
    .then(
      (result) => {
        setItems(result);
      },
      (error) => {
        setError(error);
      }
    );
});
Extra mile with Bedrock and Trellis
On this particular application I am relying on Bedrock, a very good solution to develop on a Wordpress application with managed plugin, and on Trellis, an other very food solution to facilitate the server provisioning and solution deployment (thanks Roots !, I hope to test Sage some day !)
I have done the following to help me on this project
Using mu-plugins folder
Instead of deploying the plugin in plugins I am using the mu-plugins folder so I am sure the plugin is always loaded. Does not need a plugin activation.
Enhanced deploy procedure
I want to deploy only the builded version, and never the src folder. So each time I am deploying a new version I want to build my application and send only the build folder.
Inside my trellis/group_vars/SERVER/main.yml I have added:
deploy_build_before:
  - '{{ playbook_dir }}/deploy-hooks/build-before-my-react-app.yml'
This will add a script before build time.
Let’s now create the build-before-my-react-app.yml file in trellis/deploy-hooks folder:
- name: Install npm dependencies
  command: yarn
  delegate_to: localhost
  args:
    chdir: "{{ project_local_path }}/web/app/mu-plugins/my-react-app/frontend"

- name: Compile assets for production
  command: yarn build
  delegate_to: localhost
  args:
    chdir: "{{ project_local_path }}/web/app/mu-plugins/my-react-app/frontend"

- name: Copy production assets
  synchronize:
    src: "{{ project_local_path }}/web/app/mu-plugins/my-react-app/frontend/build/"
    dest: "{{ deploy_helper.new_release_path }}/web/app/mu-plugins/my-react-app/frontend"
    group: no
    owner: no
    delete: yes
    rsync_opts: --chmod=Du=rwx,--chmod=Dg=rx,--chmod=Do=rx,--chmod=Fu=rw,--chmod=Fg=r,--chmod=Fo=r
Thanks for the Sage 9 build-before example 😉
Conclusion and some concerns
As it’s a React application I have some concerns:
- SEO: Google will probably not understand well my page…
- managing correctly CSS is tricky because the Wordpress page will inject some css classes (that you will not see in development mode using
yarn start)
This project have been realized because the classic plugin we were using for this kind of page (WPBakery) doesn’t come out-of-the-box with filtering and ordering capabilities. Some options are available but limited in personalization. And it’s fun to put some new tooling in a classic existing web application ! Get a try !